I don’t know how about you, but I prefer to make everything on my base by myself.

Well, within reason, of course. I’m not going to make my own plinths. And sometimes, I use pre-made parts, like wooden planks or cobblestones. But whenever it is reasonable, I do my own stuff. Or repurpose things that otherwise would go to the bin. In this aticle I will tell you all about making mushrooms for scenic bases.
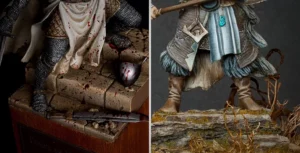
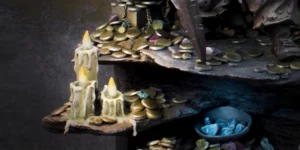
This base for Little Alice was done basically from scratch. The only exceptions are the wooden planks I used as the door and the cobblestones creating the pathway. The rest is either natural materials or sculpted. It’s full of issues and imperfections. But it’s still very special to me. It was my first elaborate base, and I did it after more or less a 10-year break in painting. And it (with the miniature, of course) gave me my first Gold at Euro Militaire in 2011. Yep, it’s that old.
Few words about Little Alice.
Alice is a beautiful girl from Smog1888. It’s a range of 1/35 models sculpted to represent Steampunk adventurers and cultists. Unfortunately, the company that released the miniatures (Smart Max) is long gone. You can sometimes find their miniatures on eBay or other second-hand selling sites.
She is one of the more benign-looking miniatures from this range. Clearly based on Alice in Wonderland with the pocket watch and giant rabbit in her arms. Did I mention the rabbit is wearing glasses? It is.
Making the base for the miniature.
It won’t be a step-by-step tutorial on how to build the base like I did for Alice. I don’t have enough documentation to do that. I will focus only on how I made my mushrooms. I don’t have enough photos for every stage of the process, I’m afraid. But I’ll explain and show you all I can; you’ll see they’re pretty simple things to make.
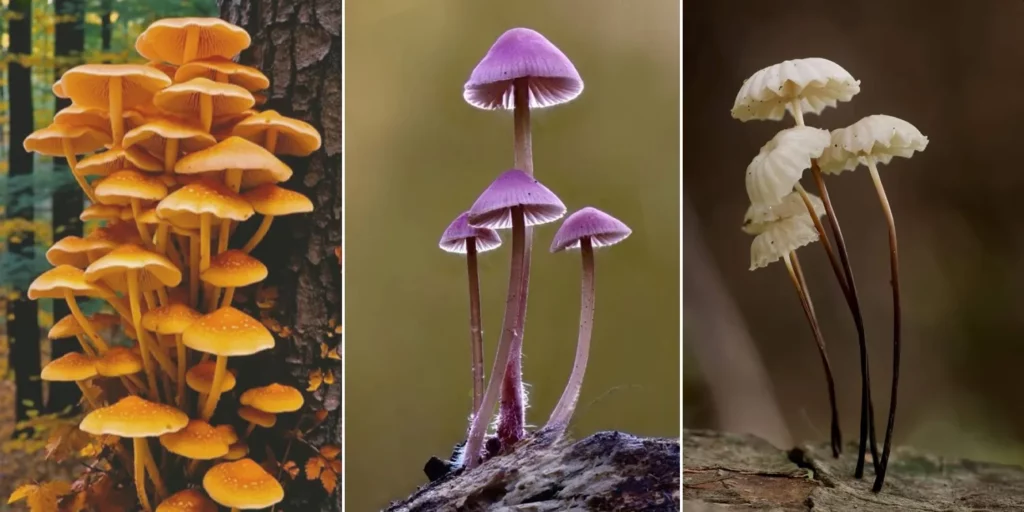
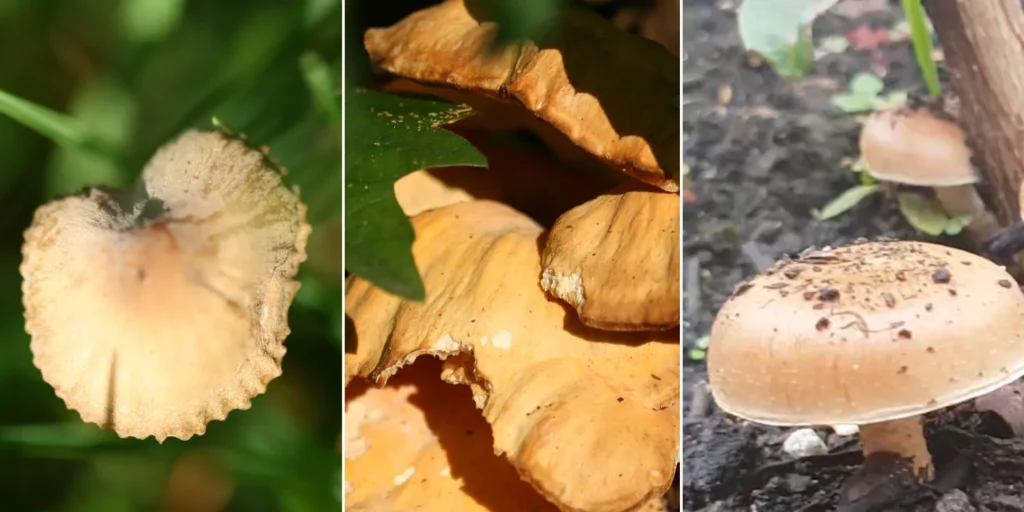
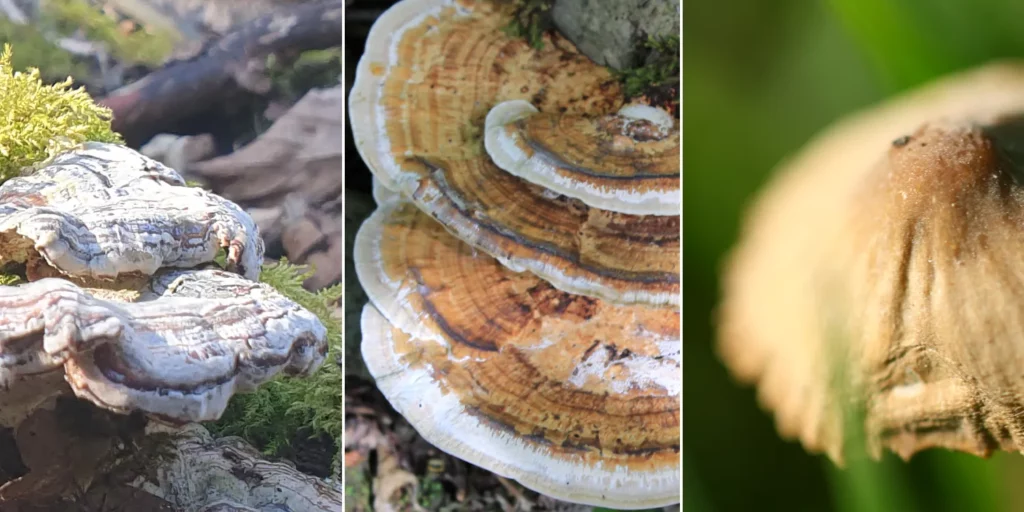
Here are a few reference photos I used to understand how I want my mushrooms to look. As you can see, they are all tall with long, thin stems. Combined with the rest of the base, they should give me the eerie feeling I wanted to achieve.
If you want more inspiration and crazy ideas, you can head to Pinterest of course. If you want to learn something interesting though, look for pages like Woodland Trust.
Materials you’re going to need to create mushrooms:
- Putty – it doesn’t matter which one. Pick whatever you’re most comfortable working with – I used Green Stuff mixed with Milliput; you can use the baked one if you’d rather work with this kind.
- Thin wire – to create stems. It has to be sturdy enough to keep shape before the putty hardens.
- Sculpting tool that can create thin lines – whatever you are comfortable with. I used a thick sewing needle if I remember correctly. Only because I had it at hand.
- A primer that goes chalky and creates a nice texture – as you can see in the photos – I used Vallejo grey in a can.
- Texturing paste if you’re lucky and don’t have bad primers.
Creating mushroom’s caps.
I took a small amount of putty and formed more or less a ball. I wasn’t looking for a perfect shape; I just wanted to get the putty slightly warmed up and formed in roughly a round shape. Then, I flattened it into a disc, making it thicker in the middle, with significantly thinner edges. Then, I bent the sides downwards to create the shape I wanted. At this point, I didn’t worry about leaving any fingerprints. I was going to cover it all with a texture later, anyway.
The bottom line of the cap can be imperfect, too; it’s even better if it’s uneven. Many mushrooms, especially older ones, are highly asymmetrical and irregular.
Depending on the size of a cap I was creating, I formed them on my finger, the end of a brush or a pen. You can choose anything that works for you size-wise. I used chemically curing putty, so I had to give it some time to harden. If you use putty that requires baking to cure, follow the instructions for your kind of putty.
Here is a picture of ready caps. They are already covered with primer, but I couldn’t find any without it in my ‘treasure chest’. As you can see, shapes are slightly irregular and differ a lot.

If I made the mushrooms now, I would add more irregularities and damage to the cups. I’d focus on the bigger ones, which could have weathered more. If you google photos of older mushrooms, they often have broken caps. It’s either a clean break line going to the middle or more organic damage, like some bugs munched on the shroom.
When the caps were hard and ready for further work, I took a bit of fresh putty and placed it inside the cap to create gills. Because I wanted the gills to be quite sharp, I used Milliput without the Green Stuff. I pressed the putty to stick nicely to the sides of the cap. I made sure the putty didn’t fill the cups completely. I didn’t reach the edges, making sure they were thin.
While the putty was fresh, I created a hole in the middle for a stalk. Then, with the sculpting tool of choice, I made some gills. I dragged the tool from the middle to the sides, creating a slight indentation. I tried to be somewhat symmetrical with it. It’s good to go around in intervals and add more and more lines between the existing ones. Once again, it doesn’t need to be perfect.

All the mushrooms I found in this particular style that I wanted had gills under the cups. If you wish, you can go for other options: Pores, teeth or ridges. Whatever works for the project you are doing.

Sculpting the stalks.
I wanted my mushrooms to be wispy and fragile, opposite to the stocky ones sitting low on a thick leg. So I took long pieces of wire and wrapped them in putty. I made steams pretty smooth and even, with only slight thinning closer to the cup. I left the top and bottom few millimetres of the wire clear to help fix them to the ground and the cup.
Before the putty hardened, I formed the steams to the right shape.

As I said, I made the steams thin and simple, without any extra elements. You can add the veil to the top of the steam to give more visual interest, but it’s optional. With some practice, you can make them thin, wispy and irregular.
Once the putty on the stems was cured and ready for further work, I attached the caps with some putty. Once again, I didn’t worry about fingerprints or other imperfections. I wanted the mushrooms to look natural and organic.

Texturing the cups of your mushrooms.
For this part, I applied a thick layer of primer that I knew would go chalky on me. I simply sprayed on the cups from the top. I didn’t shake it too well to make sure it would give them the texture I wanted. Unfortunately, it wasn’t even a necessary precaution. This sucker just never sprays smoothly. If you don’t have primer like this, you can use any delicate texturing paste. Or simply plaster of Paris mixed with PVA glue. Experiment with the consistency that works best.
To be fair, working with a texturing product can give even better results than using a faulty primer. You can localise the texture to the places you want to have it. For example, you may like to keep the middle of the cup smooth. Then, you can introduce texture gradually, making it more visible on the sides. Or the other way around, textured middle with smooth edges.
You might also prefer to keep your mushrooms smooth altogether. In this case, ensure you’re not leaving fingerprints while sculpting. Or even if there are fingerprints or other marks on the shrooms, sand them down.
I primed the bottom and stems with a different primer that gives a smooth finish.

Painting the mushrooms.
It all depends on the scene you are building and your chosen colour scheme. I wanted my scene to be subdued, not very colourful and trippy. So I went for very mute colours.
I first painted the whole mushrooms with ‘Jack bone (P3 064). Then, I gave them a thin sepia wash, skipping the cups’ middle. Then, I applied layers of washes to the cups, making them progressively darker the closer they got to the edges. I mixed Sepia with Agrax Earthshade to keep the tone of the mushrooms on the colder side. At the end, I added a few brush strokes with ‘Jack Bone going from the centre and slowly fading closer to the edge.
This painting scheme suits the whole scene. But honestly, the options here are limited only by your imagination. Mushrooms are truly fantastic in their colours and textures.

Frequently asked questions about making mushrooms for scenic bases.
If you want more specific advice about materials, painting, or attaching mushrooms to a scenic base, the answers below cover the most common questions.
What materials do I need to make miniature mushrooms for scenic bases?
You only need a few basic tools and materials to sculpt miniature mushrooms for scenic bases:
Sculpting putty of your choice, epoxy or polymer clay.
– Thin wire, for pinning and support.
– A sculpting tool for creating thin lines,
– Glue: superglue for assembly and optionally PVA for texturing.
– Primer and acrylic paints for later stages.
– Good reference photos of real mushrooms.
The wire will act as an armature, making tall mushrooms much stronger. This is especially important for gaming miniatures and in transport. Collecting some reference photos can help you keep shapes from being too perfect and dull. Real mushrooms are irregular and often slightly damaged.
What type of putty works best for sculpting small mushrooms?
There is no best putty for miniature sculpting; it’s all a matter of preference and experience. Any putty you are comfortable working with at a small scale will be a good choice. Cold-setting 2-part epoxy putties are great. You can sculpt directly on the base or its parts. Good options include Milliput, Magic Sculp and Green Stuff. They are ideal for miniatures and scenic bases from 28mm to large scales.
If you prefer polymer clay, you can use Super Sculpey or Fimo. Because you’ll need to bake it to cure the sculpt, make sure everything you do can be detached from the base.
I myself prefer using Milliput mixed with a small amount of Green Stuff. Mixing those two gives me the best qualities of both. It boosts flexibility and clay consistency when sculpting. You can also sand it after curing. Pure Milliput is very sticky and hard to form small details right after mixing. Green Stuff, on the other hand, is very hard to sand once cured. And that matters if you want to make corrections to your shapes. For small-scale sculpting, smoothness and control are key, so choose what suits you best.
How do I make mushroom caps and stems look more natural and organic?
Asymmetry and imperfections are what make mushrooms believable. Nothing in nature is perfectly symmetric. Real mushrooms are never perfectly round or clean. They are very delicate, so they break easily. Plus, many little critters munch on them.
– Squish the cap slightly to make it less symmetrical and less circular.
– Make small vertical cuts in the rim. This works well for mushrooms with gills underneath.
– Add tiny holes to mimic insect damage.
– Make the steam lean slightly to the side instead of standing straight.
– Add small debris on the cap (tiny twigs, pine needles).
Nature is the best designer. Use real-life reference photos, and look at different types of mushrooms for inspiration. You’ll be surprised by what fantastical shapes and colours you’ll find.
How can I add texture and details to tiny mushrooms without losing shape?
In general, for small scale sculpts, the texture must remain subtle. Heavy texture will destroy the silhouette and realism of the scale.
The texture I achieved here was more of an accident, and I’m not sure how reliable it is to recreate. You’re free to try using a spray primer without enough shaking, or in colder weather, but results may vary. If you want a more reliable effect, there are other, more controllable methods.
You can try:
– Sprinkle some flour onto the wet PVA glue to achieve a very fine surface grain. Be careful, use a small sieve to avoid big clumps.
– Mix fine sand with flour to create a coarser texture. This mix works well for larger mushrooms.
– Stippling liquid products, like Mr Surfacer 500 (in a jar), Tamiya Putty, Vallejo Putty, or Liquid GreenStuff.
– Pressing the hough material half into half-cured dried putty.
Whatever method you choose, remember to always protect the overall shape first. The outline of the cap matters more than surface detail. And you can always add ‘texture’ while painting.
How should I paint miniature mushrooms so they look believable on a base?
For realistic miniature bases, use natural tones. Browns, warm rust colours, muted reds and dirty creams work well for this setting.
When you are painting fantasy miniatures, you can push contrast and saturation. Bright colours or glowing effects work well if they match the base’s theme.
Find real-life examples for your mushroom colour choices. Nature offers a lot of great inspiration. Think about integration with the base. The mushrooms should either blend with the terrain, for a realistic feel, or create controlled contrast. Both approaches work well, depending on the colour scheme you are working with.
The technique used for painting mushrooms depends largely on the scale:
– Tiny mushrooms look great with just a careful dry brush and a light glaze or two.
– Medium-scale mushrooms often do better with neat methods like layering or wet blending.
– Larger mushrooms have enough surface to do some freehand and subtle colour variations.
How do I attach handmade mushrooms securely to a miniature base?
Pinning your mushrooms to the base is the most reliable method.
Use a thin wire as an internal support. You can sculpt the stem directly around the wire, or drill a small hole into the base and glue a short wire into place.
Secure the wire with superglue. For heavy scenic elements, you can use two-part epoxy glue for extra strength.
Pinning increases the durability and stability of the build. This matters for both gaming miniatures and competition pieces, especially in transit. A well-pinned scenic base survives handling much better than surface-glued elements. If you want to learn more about pinning your models, check out this article on mounting miniatures.
Can I use ready-made bits or 3D printed mushrooms instead of sculpting them by hand?
Yes, using ready-made mushrooms can save time and effort. They also look great if they fit your miniature’s scale.
You can either buy resin casts or prints, or buy an STL file and print it yourself. Printing your own gives you better control over the scale and allows you to make many copies. Buying ready-made resin pieces saves time and avoids the printing process.
Hand sculpting your mushrooms gives you full creative control. It works best when mushrooms are the major focal point of the base, or if you are looking for something special. If they are just small background elements, ready-made ones are usually the best choice.
Both options work. The best choice depends on the time available, the scale, and how central the mushrooms are to your composition.
And that’s it! As you can see, making mushrooms for dioramas is pretty straightforward. You can use them to add an eerie or mystical feel to your miniature bases or dioramas. So why not give it a try? Who knows, maybe you’ll discover a new passion for sculpting and creating unique bases.
For more tips and basing ideas, check out the Tutorial section of this blog. I’m working on creating a knowledge base covering wide array of topic related to the hobby.