In this article, I’ll show you how I created a scenic miniature base for the Viking Chief miniature from Pegaso Models.

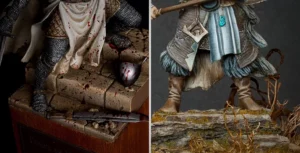
Viking Chief is a 90mm scale miniature that depicts a seasoned warrior and chieftain of the village standing on a stone step base.
The Vikings were known for their wooden structures. The stone base then most likely serves as a symbol of their conquests over more advanced civilizations. You know, Vikings being Vikings, pillaging churches and monasteries, as they liked to do.

(c) Pegaso Models
But when I look at him, I don’t see the pose and facial expression of a conqueror surveying his spoils. It’s more like a seasoned warrior, a chieftain, standing on a cliff deep in thought. He’s looking at the sea and planning a new excursion. Or, he’s just wondering what his wife is angry about right now; who knows.
That’s why I’ve decided to create a forest themed miniature base for him, with a fallen trunk (to substitute the step) and some fern and grass.
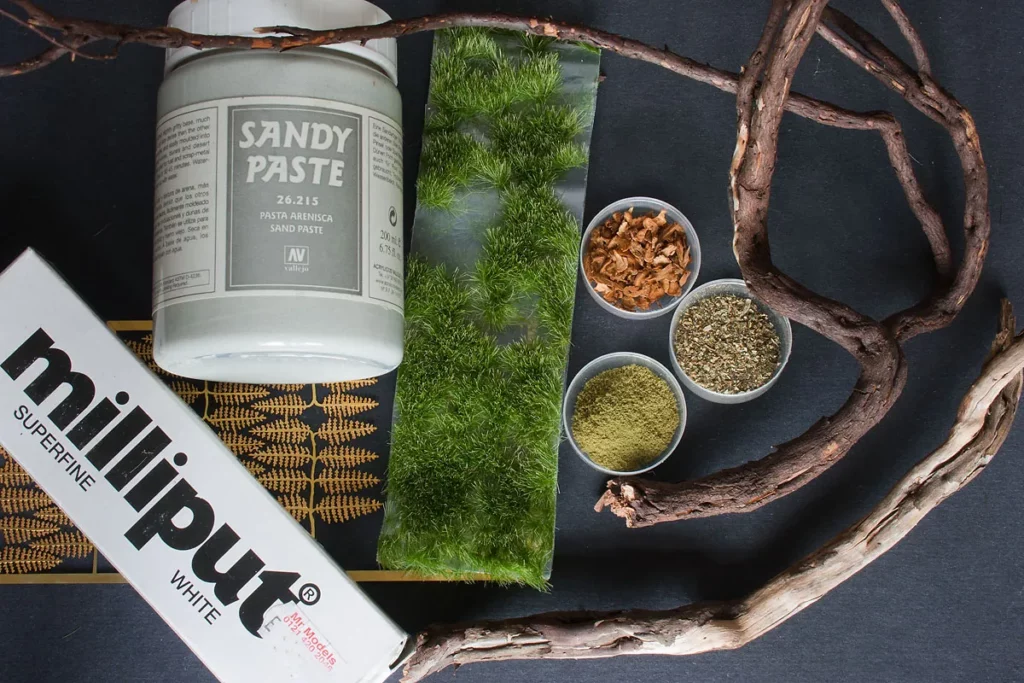
Materials used to create this miniature base:
Here you can see a list of all the materials I used for the base:
- A piece of Heather – or any other small branch that can be used as a tree trunk.
- Etched brass fern – you can use paper one if you prefer.
- Artificial grass – I chose grass that was already formed into clumps.
- tobacco bits (more on that later)
- grounded sponge – it’s widely available in hobby stores in various colours.
- Tea leaves – or any other crushed dry leaves.
- Texturing paste – I used Vallejo Sandy Paste, but you can use any material of your choice or go for sand mixed with PVA,
- Milliput or any other self-curing putty.
Creating the tree trunk.
First, I had to choose the best piece of Heather and cut it into the correct size. I went for a branch with a split end. It helped me to create the illusion that it broke under the strong wind or lightning, not cut down by the axe. Falling bark will add more character, making it look like something has been lying on the ground for a while now.
Old branches of Heather work great as tree trunks in scale. They’re really ideally oval in profile, often having a lot of deformations and weird knobs. All the imperfections and strange recesses create visual interest. Also, the texture of the bark looks convincing in scale and represents tree bark very well. The bark also falls off the trunk quickly, leaving nice, smooth surfaces. This makes the trunk look like old and damaged. I really like using it for miniature bases whenever I need tree trunks or logs.
Cutting the other end was trickier, though. Heather is pretty hard, so you need a proper saw to cut it properly. And you need to be careful so you won’t hurt yourself while cutting.
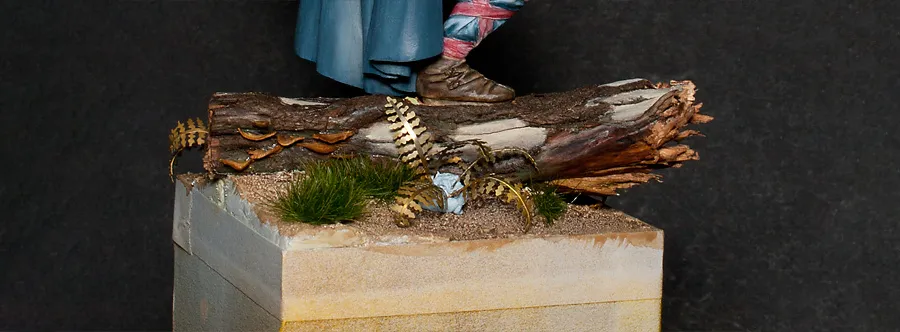
Then, I placed the cut piece on the base. On a slight angle, with the damaged end pointing in the same direction the Viking will be looking. It created harmony in the piece. Around the wood, I placed some Milliput to mimic the ground and make space for the socket for the other foot.


Adding texture to the ground.
When I was happy with the shape of the ground, I covered it with sandy paste to add some texture. I’ll cover most of the ground with some foliage later. But if some of it shines through between the plants, there will be some interesting texture.
Creating miniature mushrooms.
With the ground more or less ready, I reached into my tobacco stash to create some mushrooms on the trunk.
To be fair, the whole idea of using tobacco as mushrooms is not mine. The credit is due to guys from MassiveVoodoo, and in this article by Roman, you can find more informations that inspired me to try it on my own. And here, if anyone’s interested, you can see a photo of the best ‘mushroom material’ I could find so far. I’m not gonna publish the picture here. I’m against smoking, and I don’t advertise it any more than necessary.
And yeah, so far, I haven’t found anything else that could replace tobacco cuttings in creating tree fungi. I might try sculpting some and printing them out in the future, but for now, it works.


The process itself is straightforward. I picked some of the tobacco stem cuttings from my stash of preselected materials. They are usually round or elliptical in shape. I cut one side of each with the scalpel and glued them to the trunk with a bit of Super glue.
Tree shrooms usually grow in a particular formation. It’s good to research them before glueing them to the trunk.
Adding the Miniature to the Base.
With all that done, I placed the mini on the base. First, I had to cut a hole in the trunk to hide the piece of metal under Viking’s foot. Again, it was a challenge, with Heather being as hard as it is. So, if you also work with it, be careful of your fingers.

Adding Ferns to your miniature base.
Next, I started work with Fern.
I used brass etched fern because I already had it in stash. You can use paper ones if you prefer. For me, brass is more durable. And even if it’s harder to form them to look natural, I still prefer the longevity of metal over paper. But like with everything in this hobby, try some of the options.
Etched brass is still thin enough that working with it is pretty simple. I gently shaped some of the leaves more naturally, trying to mimic different stages of growth. To keep the curves of the stem fronds, I used various cylinders to achieve initial bends. Then, I used small round pliers and fingers.
After shaping the fronds, I placed them around the trunk in bits of Blutac just to find out the shape of the plants. When I was happy with that, I put some grass around, for now, without glueing it, just to find out the right spots. Because I had to paint every fern separately, I took a few photos of the base from different angles. It allowed me to place them more or less the same way after painting. And, of course, to ensure I won’t mix them, I kept every bunch on a side while painting. I took photos of this stage but lost them, so you must take my word for it.

More groundwork.
With all foliage in place, or at least planned, I could move to the moss and dead leaves on the ground. Even in the middle of the vegetative period, some leaves always lie on the ground in the forest, especially under the big trees. I used a grounded sponge to create moss. You can buy it in almost every hobby store. They come in various colours, it’s good to have a selection for different occasions. I used the warm yellowish shade of green to add some variety of colour. I glued it mainly under the trunk and Fern.


For the dead leaves, I used some tea bags. Tea leaves in the bags are usually crushed into almost a pulp. In the scale, it makes them look like old, broken, dead leaves lying around for at least months. A bit of glue between the tea makes it look even more like decaying foliage.

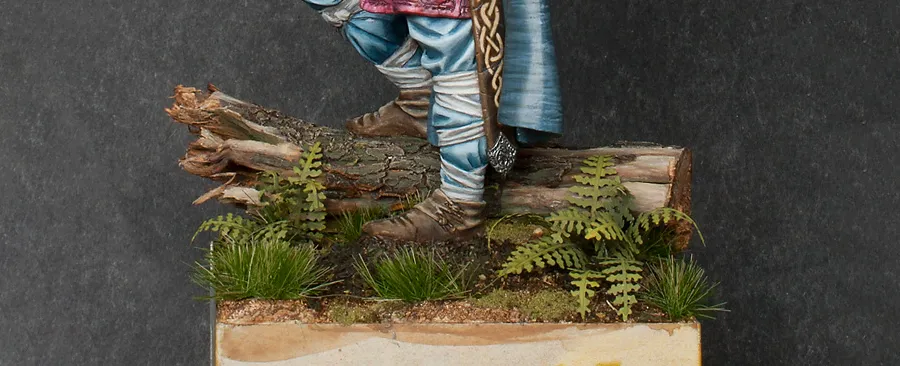


And the miniature base is finished.
After I’ve painted and glued it all together, I used more tea and a grounded sponge to mask more ground under the fern and grass. At the end, I carefully placed a few bits of bark around the trunk as if it had just fallen off under the Viking’s shoe.
Here, you can see what the finished and painted miniature base looks like.


I hope this guide has given you the inspiration and confidence to take your miniatures and their bases to the next level. You can do this by creating your own stunning scenic bases.
And remember to check out the next part of this article. I share the painting and finishing techniques I used for this miniature base.
But most importantly, don’t be afraid to experiment. Use different materials and try new techniques. And create truly unique and personalized bases and dioramas. Let your creativity run wild, and enjoy the process of bringing your miniatures to life!
Happy modelling!