Are you looking for a way to add a touch of warmth and cosiness to your miniature scenes?
Creating a moody library or castle scene? What about using miniature candles? They are a great way to change the feel of the whole piece.
Making your own miniature candles is easy and fun! While it may seem tricky initially, you’ll enjoy the process once you get the hang of it.
This guide will show you how I made my miniature candles using simple materials and simple steps. You can find most of the things you’ll need in your home already. Also, I will share tips on painting and lighting your candles to make them look more realistic. So, gather all your materials and let’s dive in!
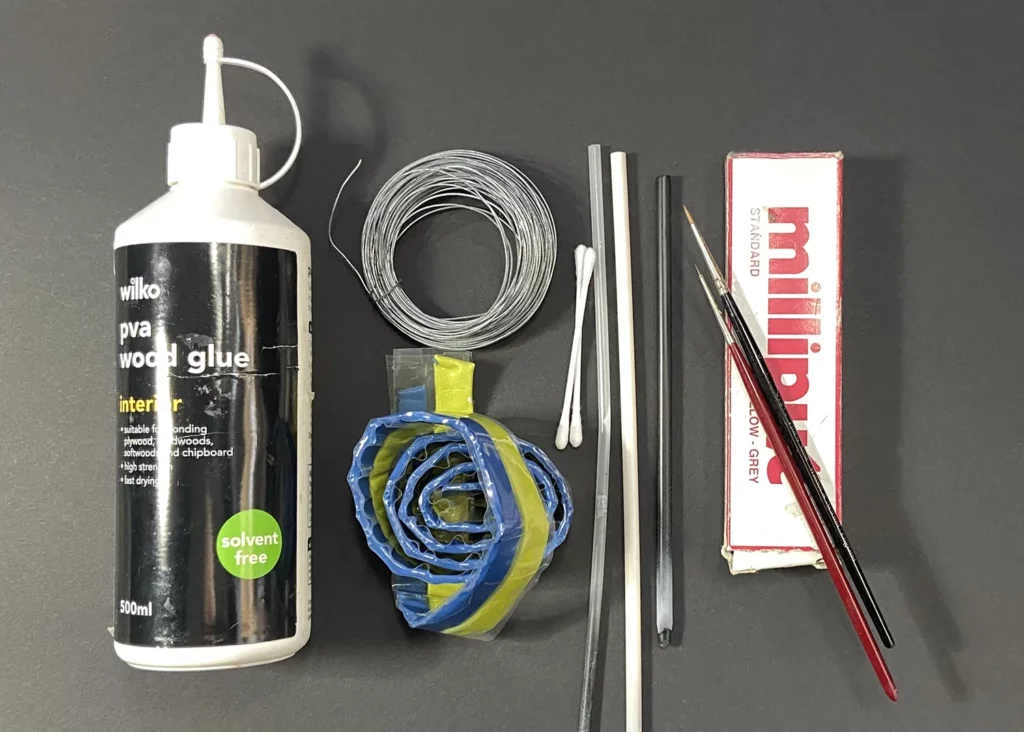
Materials you are going to need to make candles:
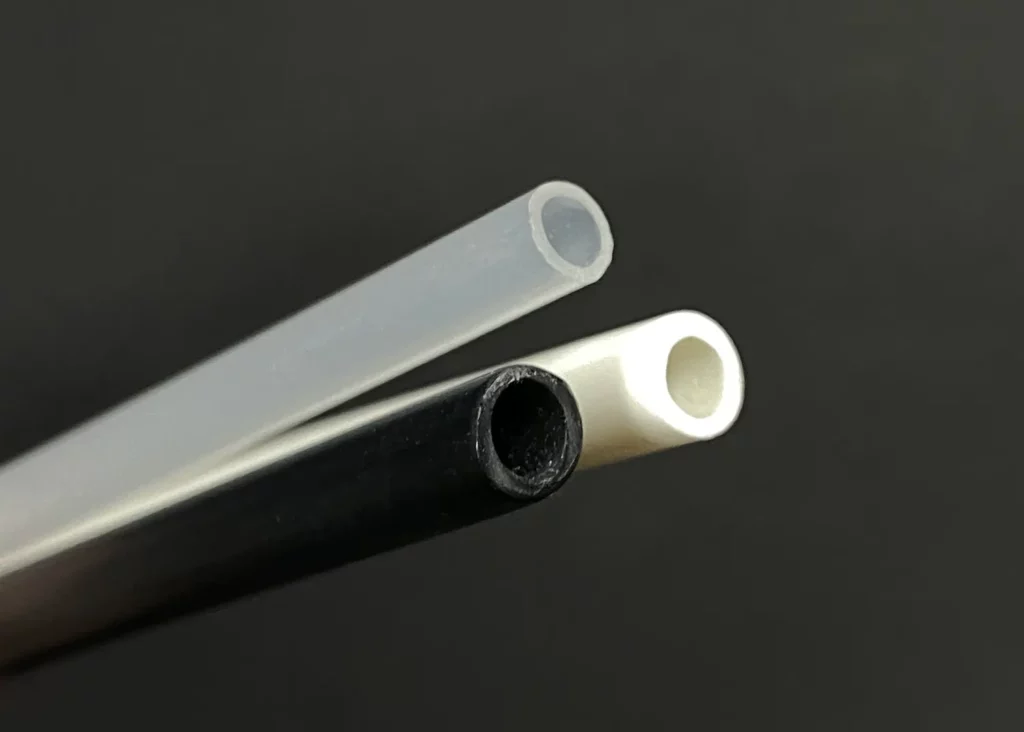
- Sticks – These will be your base to form the candles. You can use any ‘pipe’ with a diameter suitable for your project. Look for cotton buds, small plastic tubes, or empty pen refills to make thin candles. For thicker ones, go for plastic pipettes or thicker plastic tubes. Try to pick something hollow to make the top indentation easier. But if you have a solid piece, you can always make a small hole in the top using a hobby knife. Or you can add some putty in a ring on top of it and smooth the sides.
- Thin Wire: This will be your wick. It should be thin enough to look right for the size of your candle.
- Putty: You’ll use it to fill the inside of your candle and create the indentation. Use any putty that doesn’t need baking to harden. My favourite is a mix of Green Stuff with a bit of Milliput for easier sanding. But feel free to use whatever putty you’re comfortable with.
- PVA Glue: This will mimic the melted wax. Use the thickest one you have. You can even keep a blob of the glue on the tray for a while, waiting to thicken even more. The thicker the glue, the more defined the wax will be.
- A Thin Brush: You’ll need it to apply glue. Any old small brush will do. With care, you shouldn’t damage it by pushing glue into the ferrule. But it’s not worth the risk of ruining your good brush.
- Patience: Making candles takes time, but the results are worth it.
PVA glue is ideal for mimicking melted wax, at least in my experience. It works best due to its thickness and slight ‘gumminess’, making it dry in separate layers. When applied, it also runs a bit, so the gravity makes the drips look even more realistic. You might try to experiment with different thick glues instead of PVA. But I can’t guarantee the results. You may not get the same wax-like texture.
Step-by-Step Guide to Making Miniature Candles:
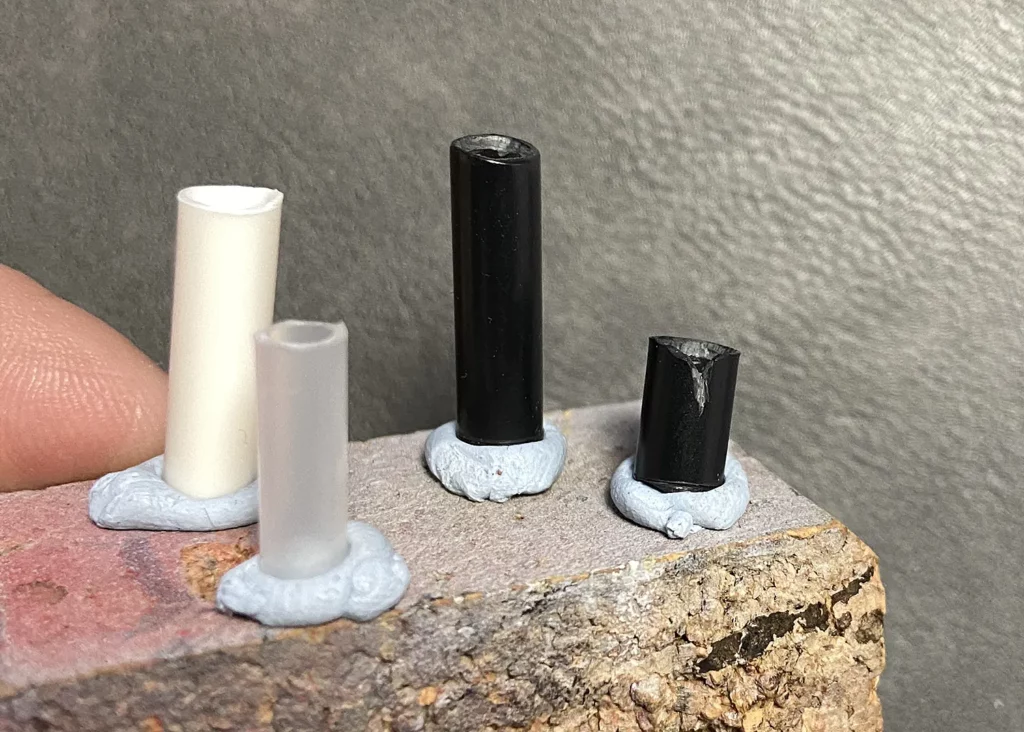
Prepare the sticks.
Cut your sticks to the correct length. It’s good to have candles of different lengths to show that some burned longer. If the ends are rough, smooth them out with the X-Acto knife or sandpaper. Alternatively you can sculpt your candles from putty by rolling them into thin ropes. Once the putty hardens, cut it to size and let it dry completely.
Attach the candle to a Base.
Use blue tack or putty to fix the candles to a flat surface while you work on the wax. You can also permanently glue them in the final place and add some melted wax around the base using putty or PVA. But before you do this, ensure you have enough space to work on the dripping wax.
If the sides of the tube are thick, I sometimes thin the sides at an angle with the hobby knife. I’m really careful doing that, not because I’m afraid to damage the candle (uneven top is not an issue), but because I like my fingers intact.
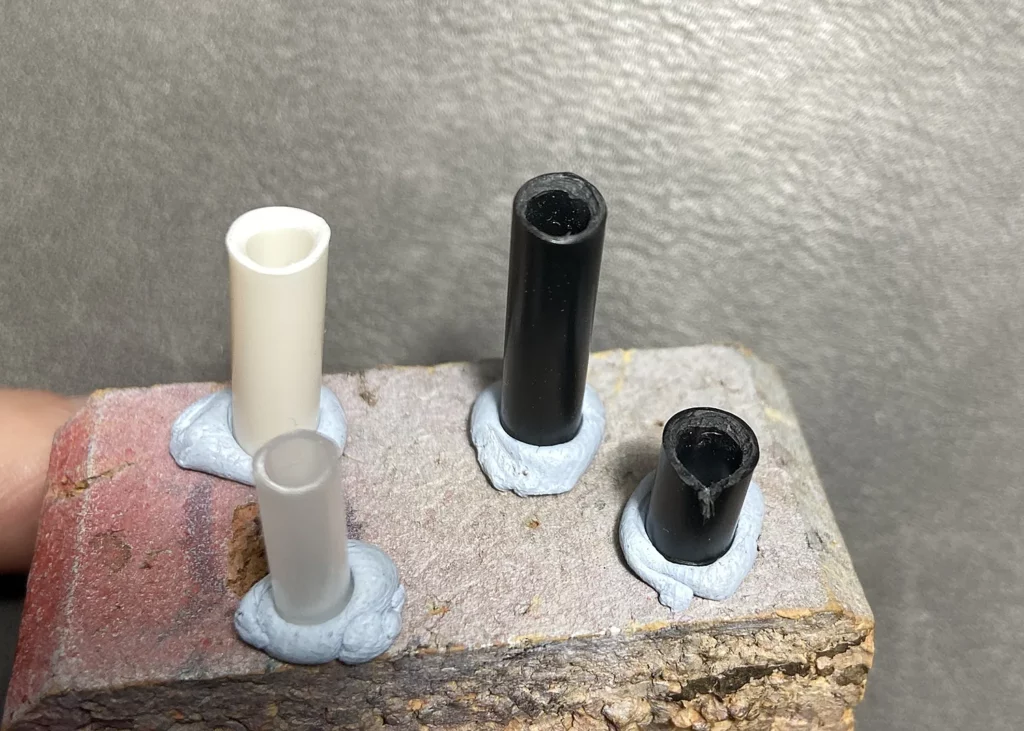
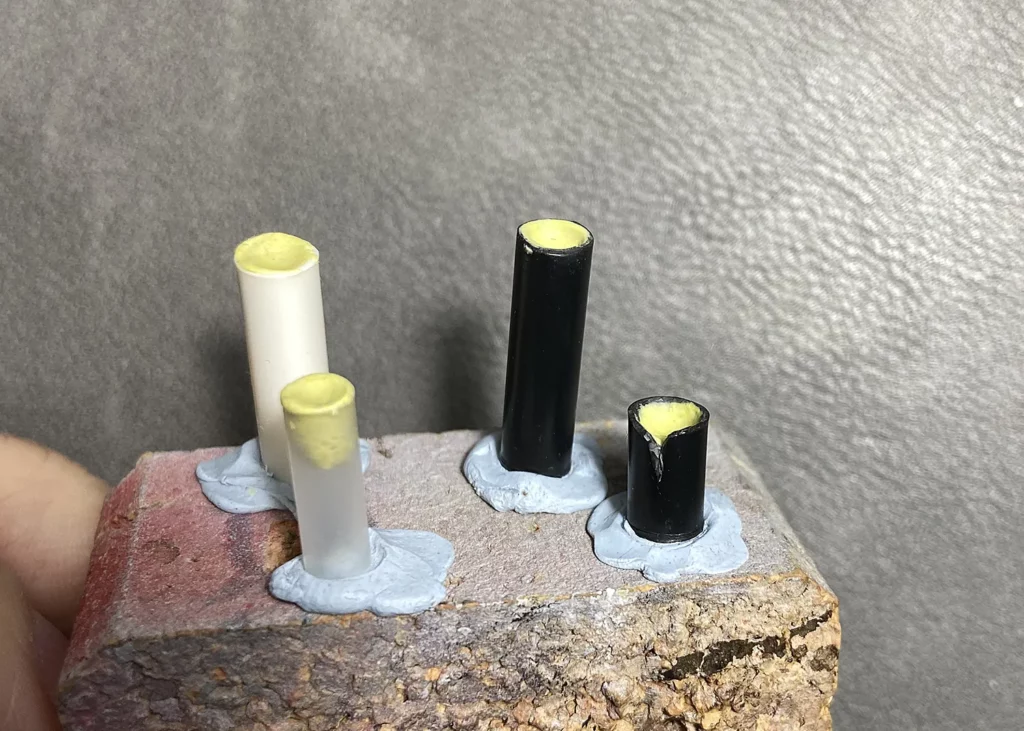
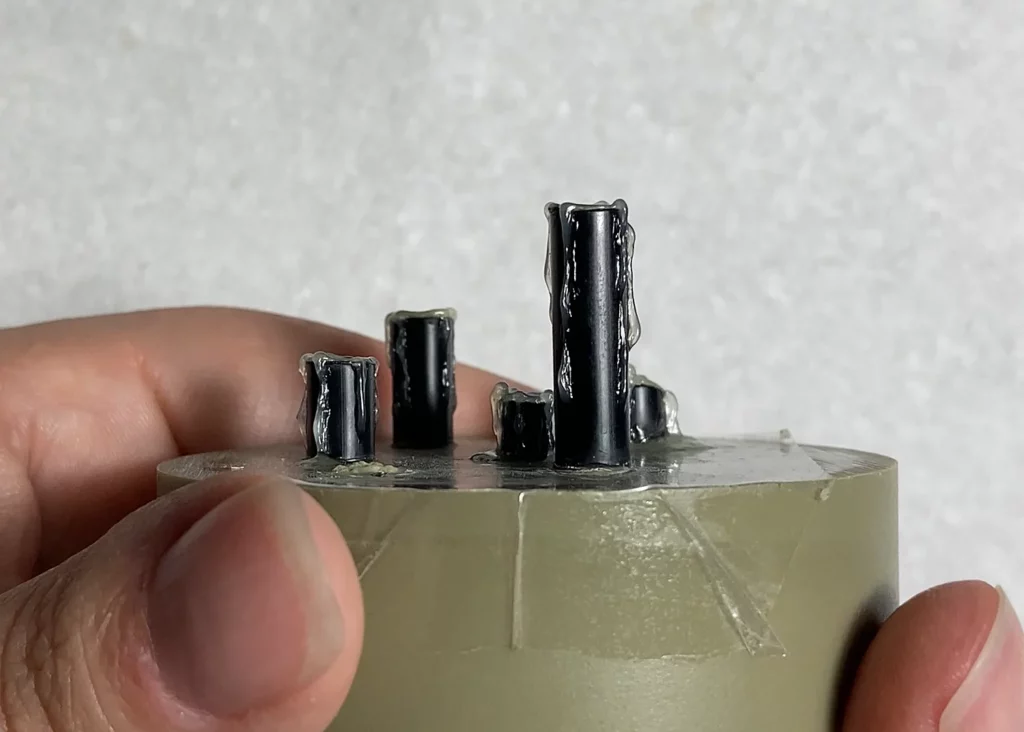
Fix the top of the candle.
Put a bit of putty inside the tube, and make sure it creates a slight indentation. Candles that burned for a while have taller sides with a pool of melted wax around the wick.
Create the Flame.
Roll a drop-like shape of putty around the wire to form the flame. If it looks too narrow, add more putty at the base to widen it. When the putty hardens, you can sand the tip to make it sharper and more refined.
Add the wick to the candle.
Push the cut piece of thin wire into the top of the stick, ensuring it’s centred. If your candle is not burning, leave a very short piece of wire sticking out
Sometimes I’m leaving adding the wick to the end of the whole process. It doesn’t really matter what order you’re doing it in, whatever is most convenient.
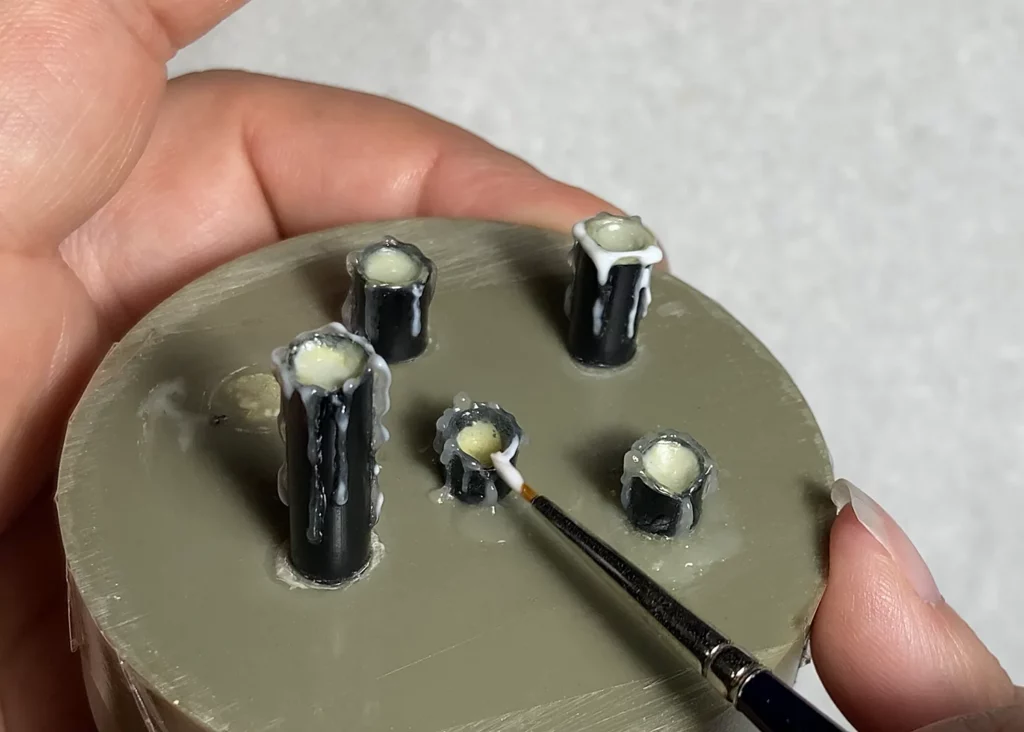
Start adding Melted Wax.
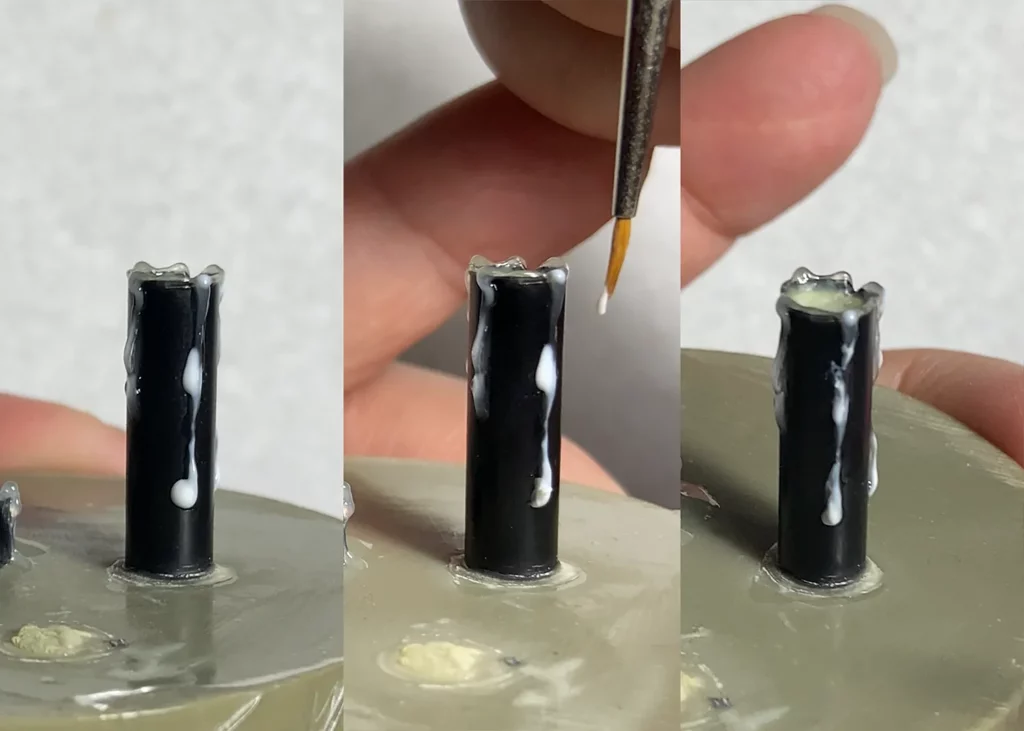
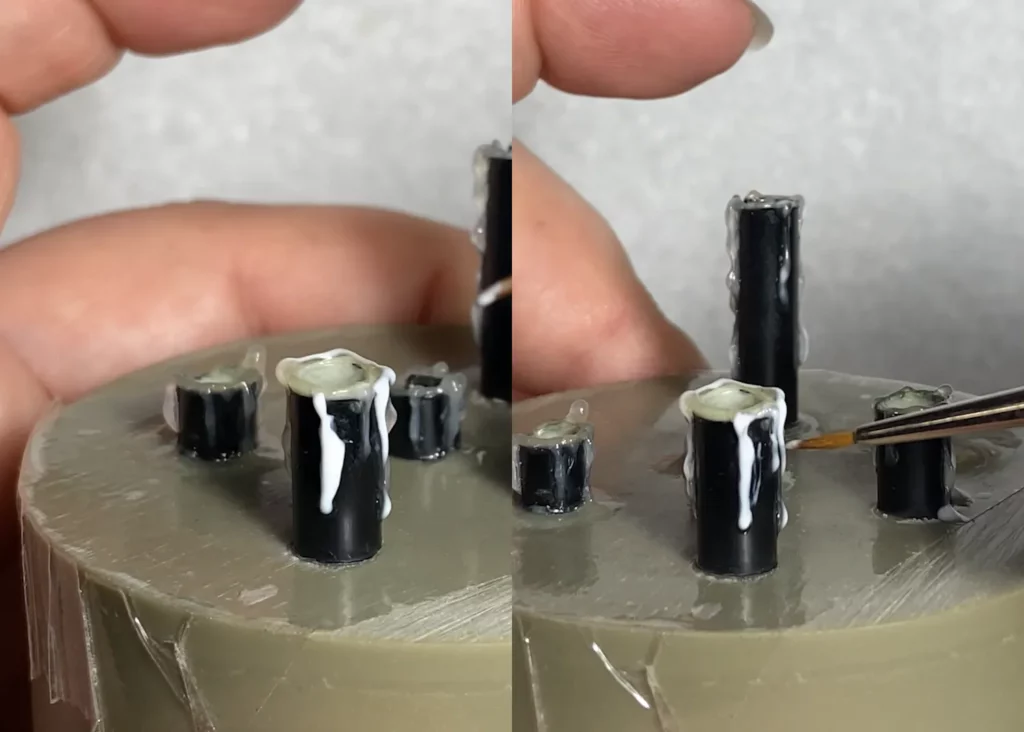
Apply PVA glue to the candle to mimic melted wax. Start with a ring around the top, making it uneven for a more natural look. Then, use a small brush to add drops of glue along the sides to create drips. Layer the glue and wait for each layer to dry before adding more, giving the wax a more realistic texture.
The amount of PVA you want to add depends on the state of the candle. Some of the candles, especially the burnt ones, have colossal wax structures around them. Check out reference photos for more inspiration.
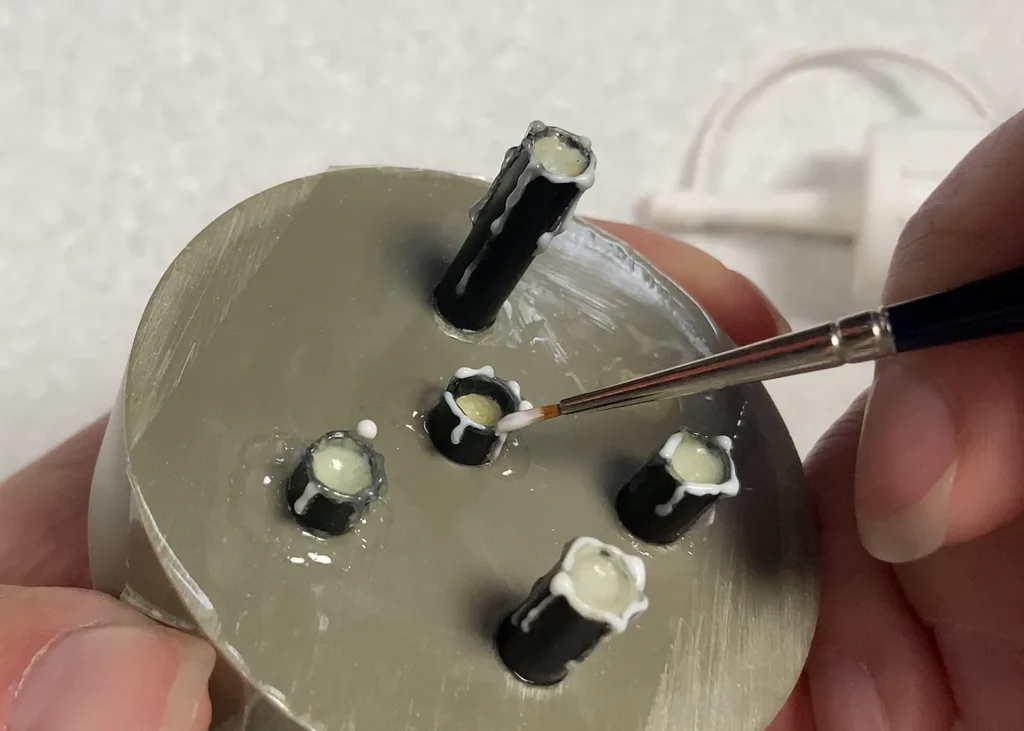
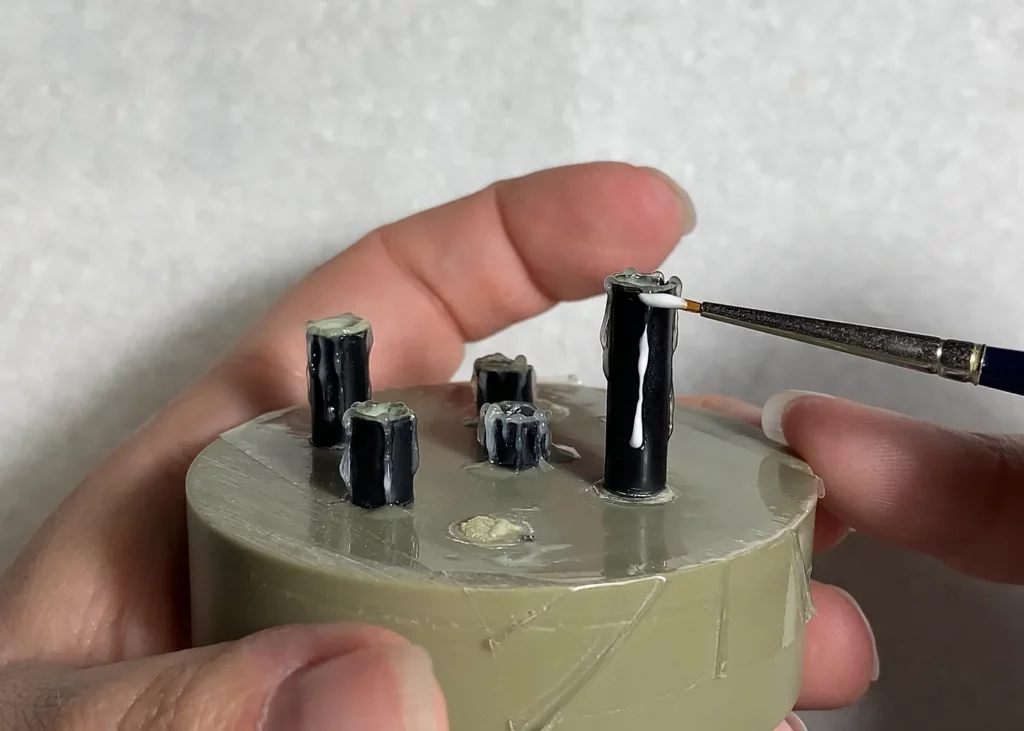
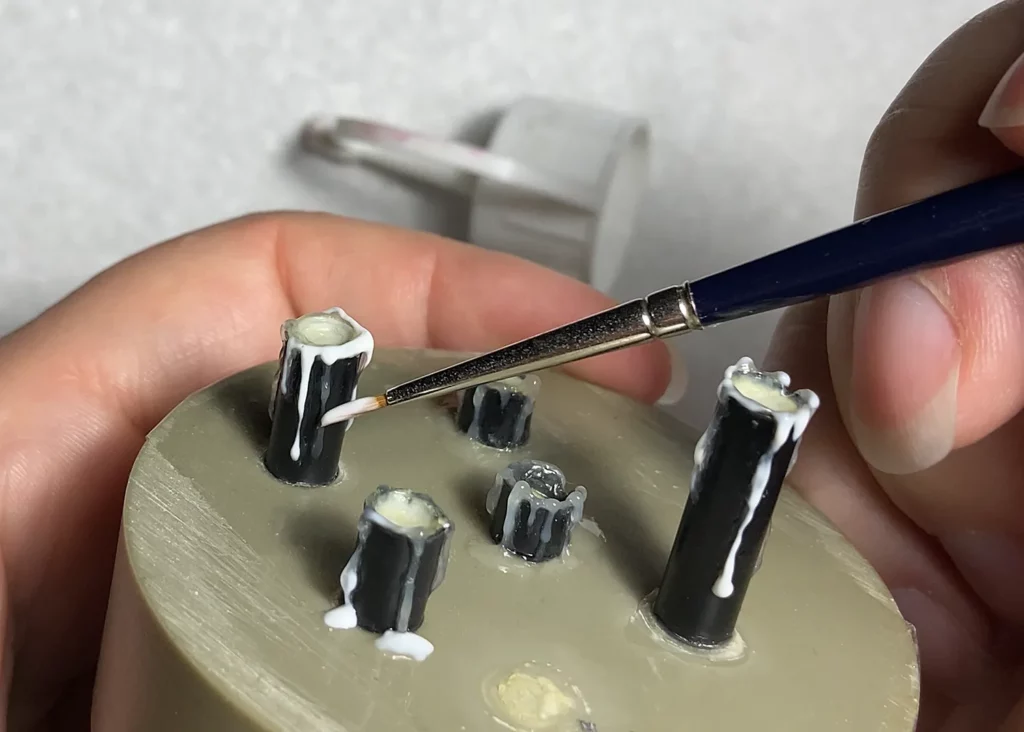

The drying time of PVA glue depends on the amount used and the thickness of the layer. It’s not an exact science. I wait till the layer starts turning clear. At this stage, even if not fully cured, the top of the glue is solid enough and won’t blend with the new layer. You can see how it looks like in the photos below.

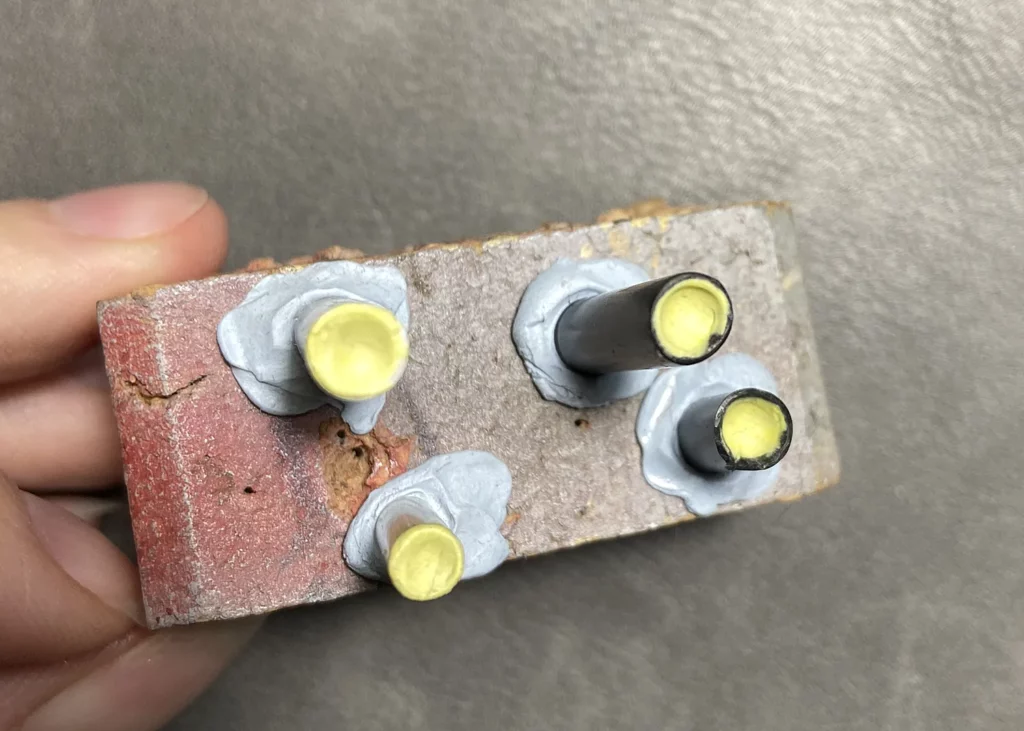
Add Final Details.
Once the candles are dry, you can fix them permanently to the scene. For short, almost burned-out candles, glue them first with super glue. Then, add PVA glue around the base for a melted look.
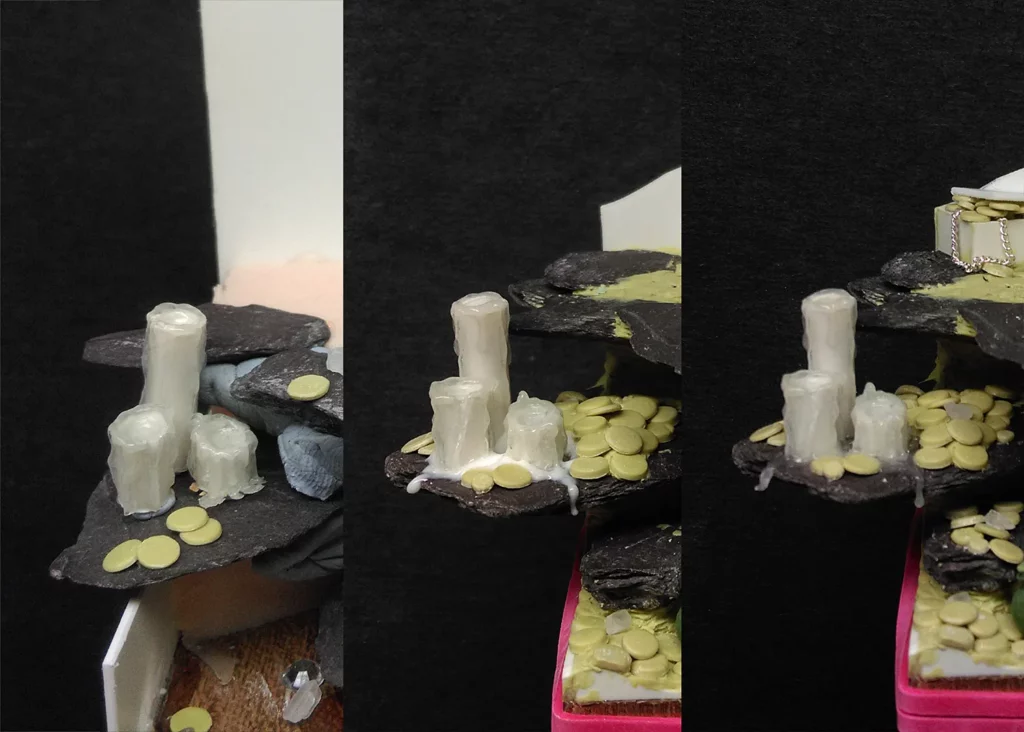
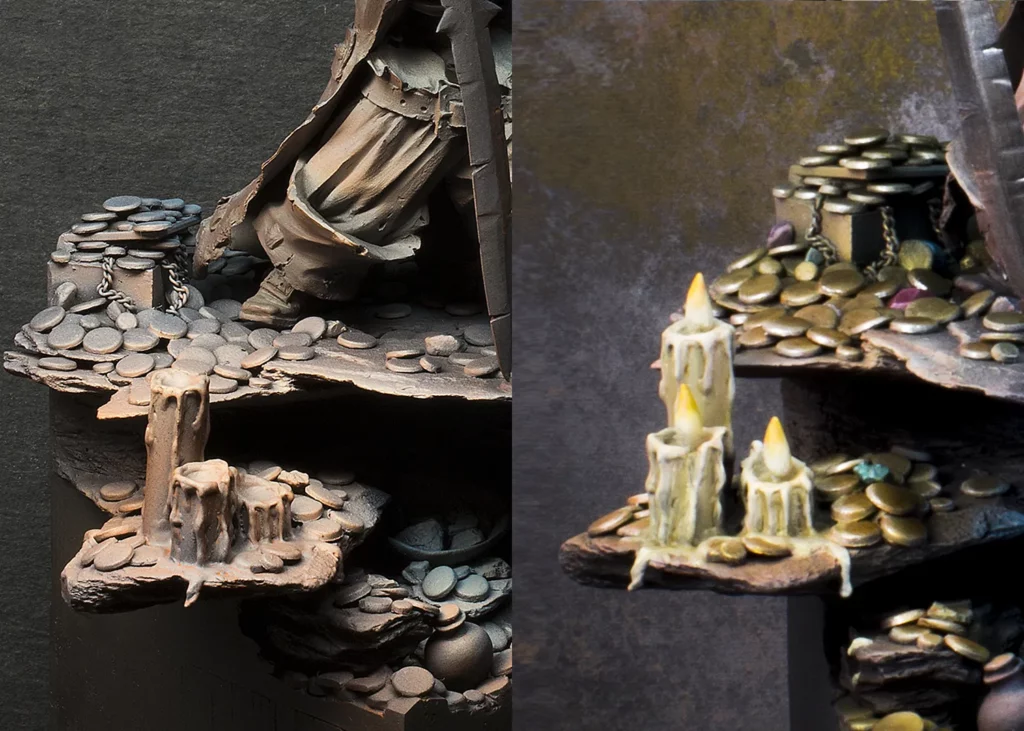
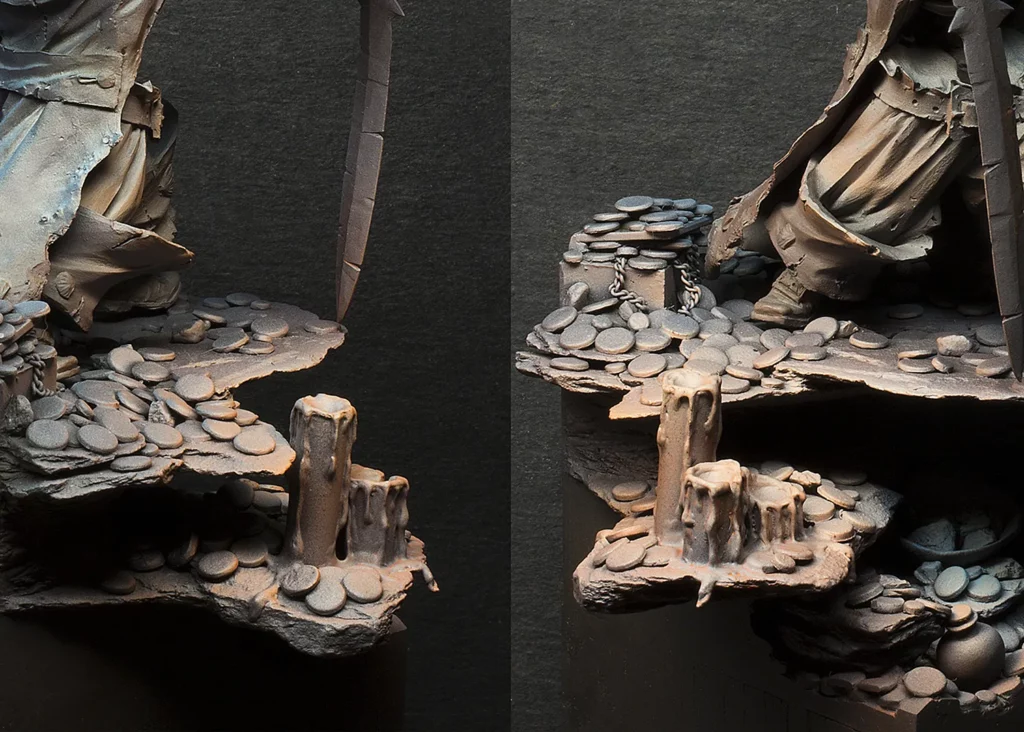
The amount of glue around the candles is entirely up to you. In the photos below, I approached it in two ways. In the first photo, plenty of ‘wax’ is around the candles, dripping from the shelf the candles are standing on. In the other photo, there is less wax.

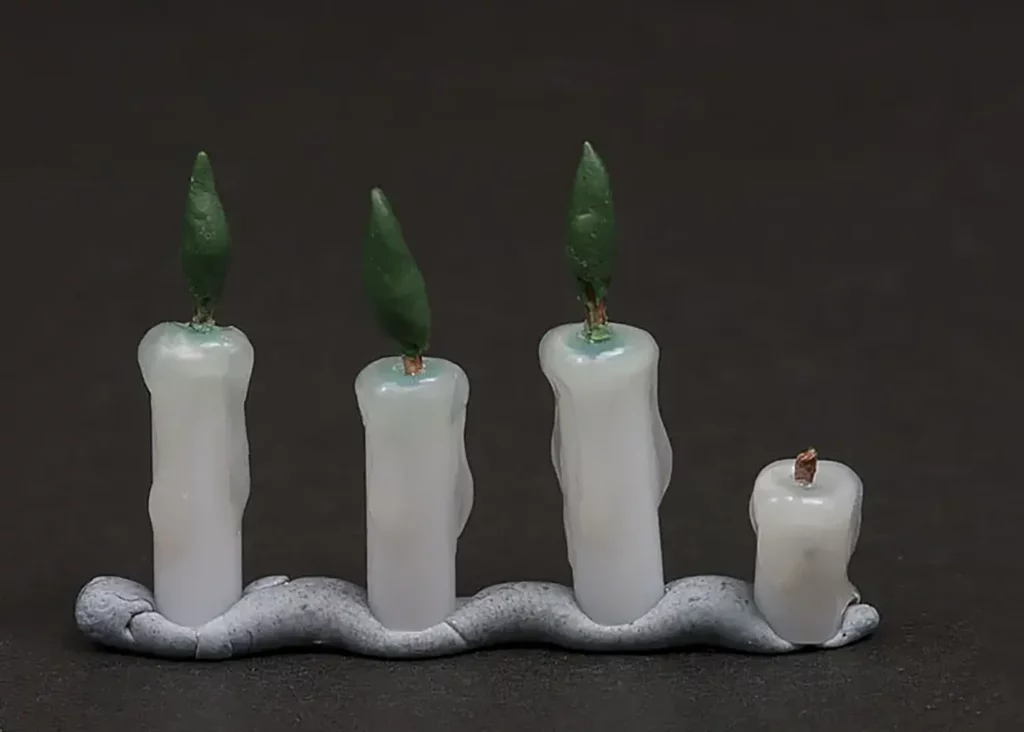
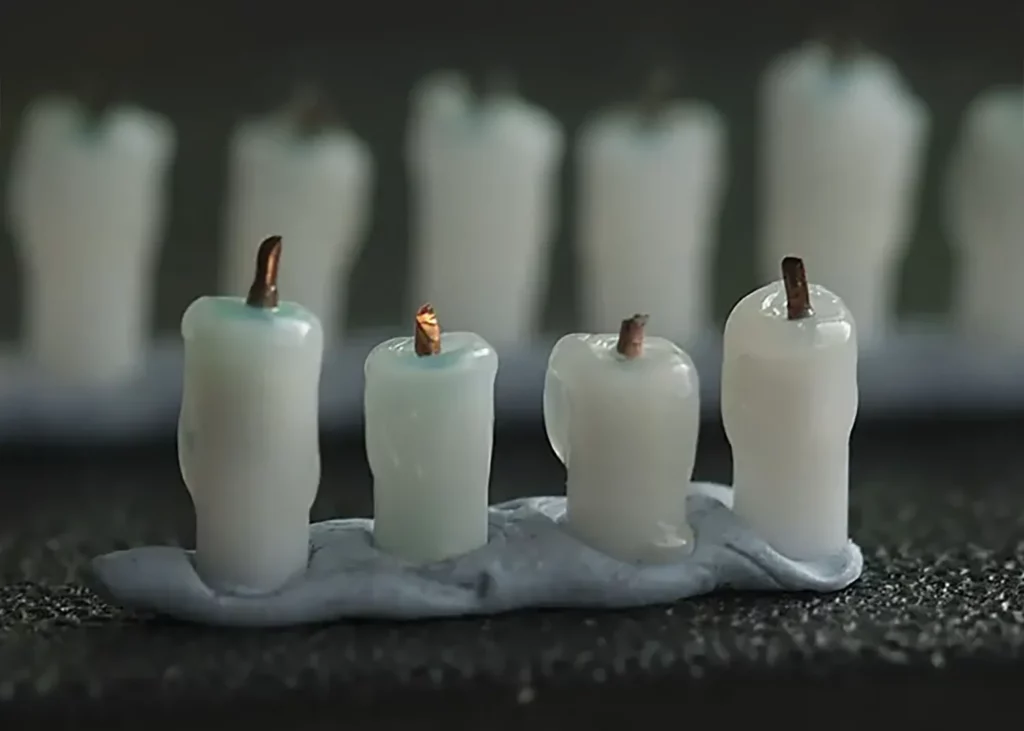
Here is the picture of the finished candles. The PVA glue cures clear, so it’s hard to see what’s happening. You can see the candles after priming in the photos showing painting process below.

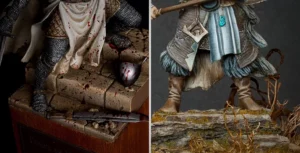
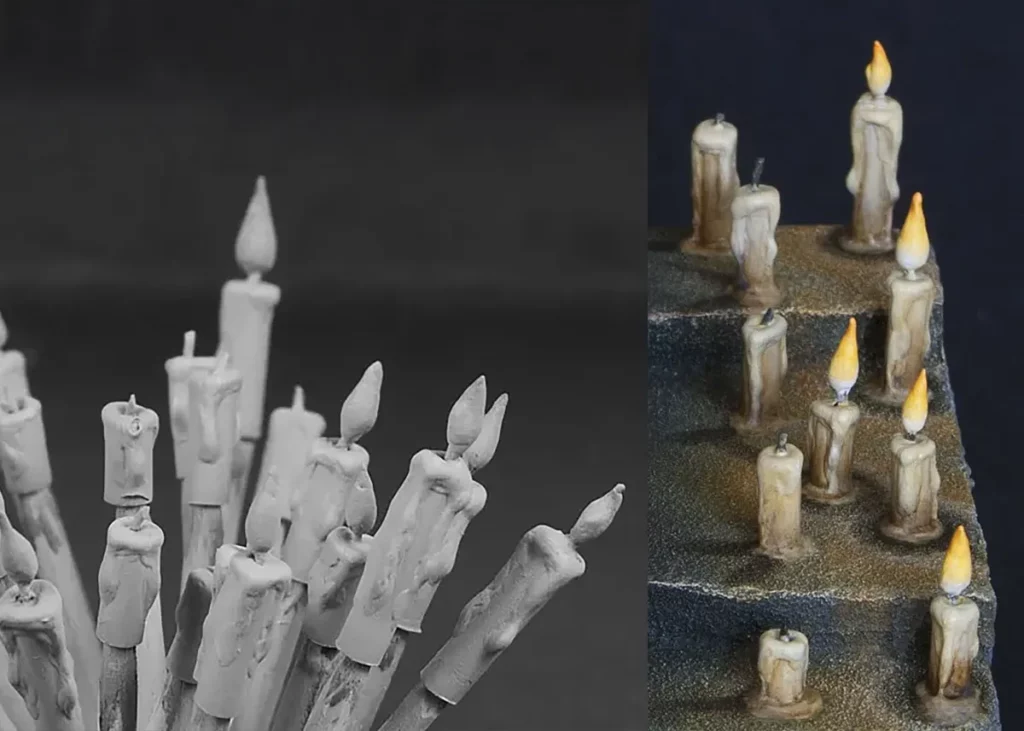
As with most things, I’m using the candles for miniatures in different scales. The thick candle on a smaller scale can be used as a thinner one on a bigger scale. Just remember to try to keep details with the scale.
Here, you can see the difference in details I attempted to create for different scales.
Common Mistakes to Avoid:
From my experience so far, I see two main areas where I need to be careful to ensure everything looks realistic.
The first one is keeping candles with the scale of the model. If I work with a small scale, the wax drips must be thinner. I’m working with a thin brush and smaller amounts of wax to achieve that. With a bigger scale, I can work faster, with more glue applied in one go. Still, I need to be careful, which leads me to the second point.
Sometimes, if I’m not careful enough, the glue can spread too much on the candle, creating quite a mess. Thankfully, I can quickly fix it with a clean brush. Even if it’s not perfect after the fix, I will cover it with more glue so it won’t be visible.
Painting Your Miniature Candles:
Painting candles depends on the light sources in your scene. If candlelight is the main light source, the tips of the candles will be bright. The bottoms will be in shadow, creating a strong contrast. If the candles stand in a brighter light, they will be like any other object in the scene. Here’s a basic guide to painting an off-white candle:
- Base Color: Start with a light yellowish colour like Menoth White Base (P3) or any other bone-like colour.
- Highlights: Use Offwhite (70820 Vallejo Model Colour) for lighter areas.
- Shading: Add Sepia Wash (Vallejo or Citadel) to darken the crevices.
- Warmth: Use yellow glazes to give the candles a warm glow.
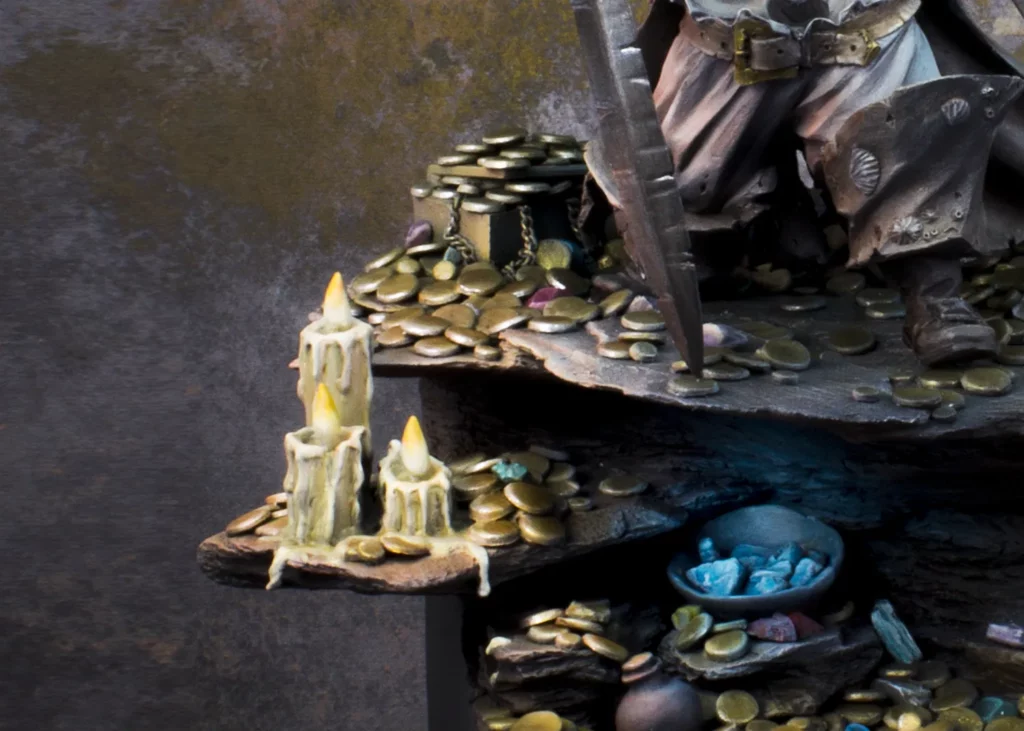
Below is the process I followed when painting the candles and adding the OSL effect to the base. The candlelight in the scene is quite strong, but still only an additional light source. Because of that, the candles aren’t deep in the shadow at the bottom.


Painting the Flame:
Painting flame is tricky. Looking at various photos of burning flames, I had one idea of how to do that. Unfortunately, the way people do it in miniature painting looks completely different. Because of the visual effect, I went with the painter’s approach. Here’s a simple method:
- Base of the Flame: Paint the bottom part of the flame a bright yellow or white.
- Top of the Flame: Add orange or red to the top.
This way, you’ll give the flame a natural gradient, starting bright at the bottom and fading towards darker orange at the top.
Lighting Effects:
If the candlelight is strong enough to affect the surroundings, try Object Source Lighting (OSL) on the floor or nearby objects. OSL is a tricky effect depending on how strong the other light sources are. If the miniature candles are the brightest light, add some glow to the surface they are on. I’m still refining my technique, so feel free to experiment and find what works best for your scene.
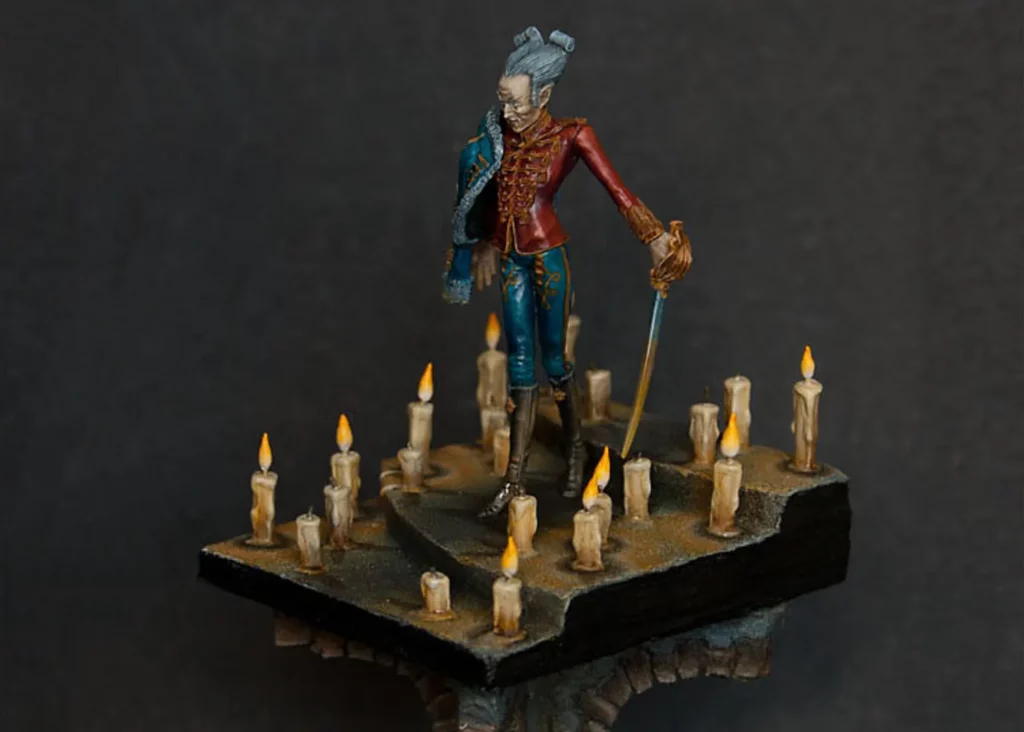
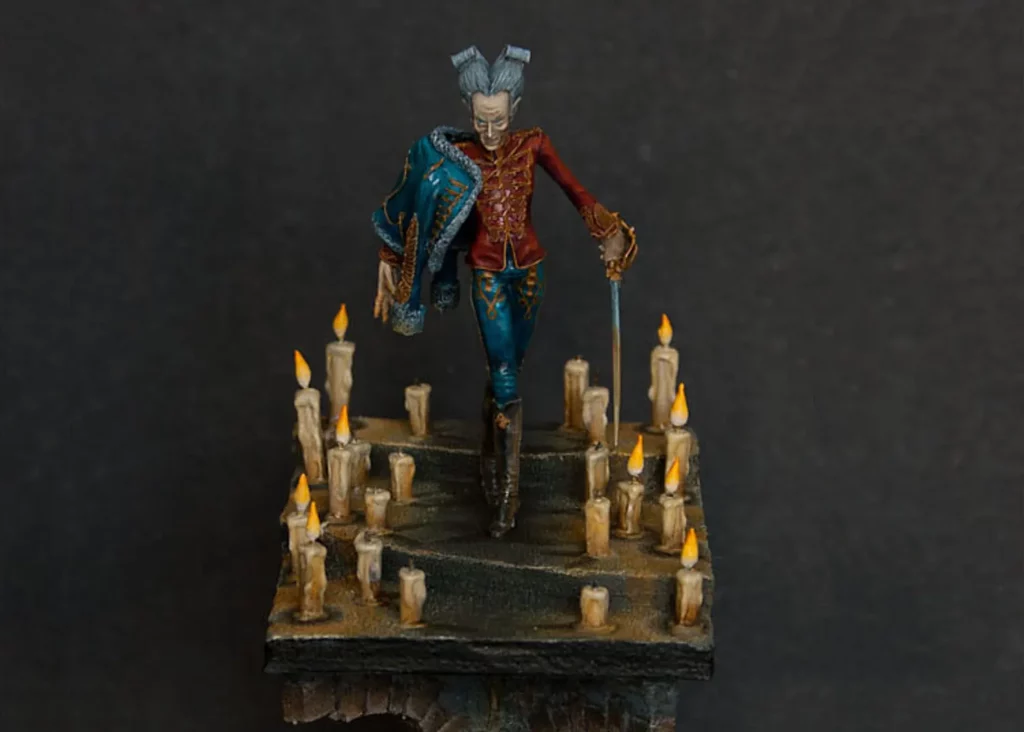
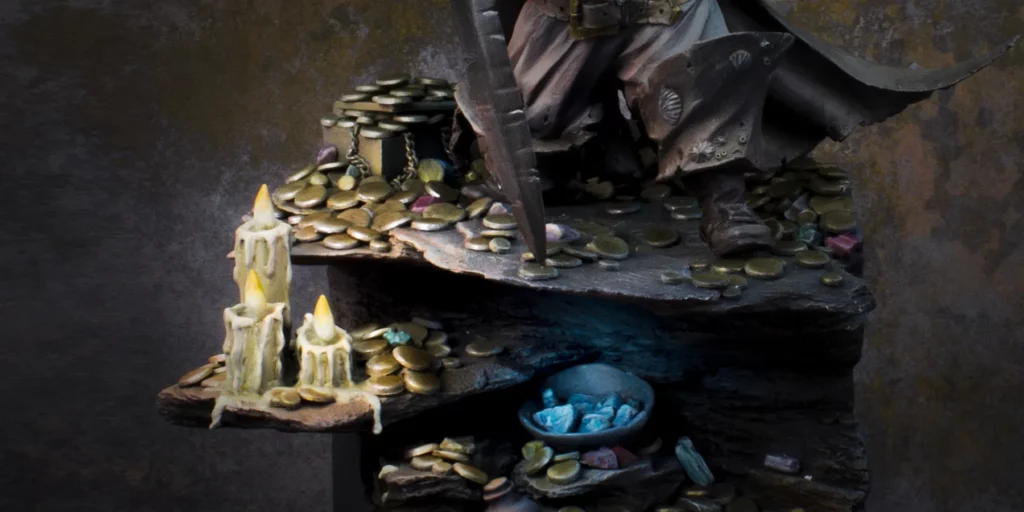
When I was painting Maquis the Marquis de Carabas (from the SMOG, a Victorian Fantasy range by Smart Max – miniatures are discontinued for many years now, but you can see how cool they were), I aimed at strong OSL, where candles were the primary light source.
You can see strong shadows on the lower part of the candles, a dark circle around them, and an intense yellow tint to the ground around the candles. I even painted shadows cast by the candles closest to the steps’ middle. My success in this endeavour is debatable, but I learned a lot when painting this piece.
Final Thoughts:
Making miniature candles is a rewarding process. And it adds warmth and atmosphere to your dioramas. Focus on the details – like how wax drips and the flame’s shape – and take your time. With practice, you can create candles that bring your scenes to life. And as always, experiment with different colours and lighting effects. It will make your miniatures more dynamic.
Thank you for reading, and happy crafting!
Enjoyed this guide? Want more creative projects, tips, and step-by-step tutorials?
Explore more of my tutorials to discover new techniques, unique ideas, and hands-on tips that’ll help you take your hobby skills to the next level. Check out my latest tutorials right here!
Whether you’re a beginner or a seasoned hobbyist, there’s always something new to learn!